Using OpenIddict to easily add token authentication to your .NET web apps
• blog
OpenIddict is a quick and easy way to get your web application talking to an authorisation server using OAuth.
This article assumes you already know what it is, so I’m going to dive straight into talking about each step required to get your authorisation server up and running, starting from File -> New project for both the authorisation server and the client web app.
Let’s go.
Authorisation Server
Edit: 19/01/2016
Add this to the Startup.cs in your OpenIddict server app:
app.UseOverrideHeaders(x =>
{
    x.ForwardedOptions = ForwardedHeaders.All;
});
This middleware retrieves the transport security protocol from the proxy headers and restores the real scheme.
For instance, if you are using IIS and Kestrel, the communication between the two is made without SSL, so the connection is reported as HTTP-only.
EndEdit: 19/01/2016
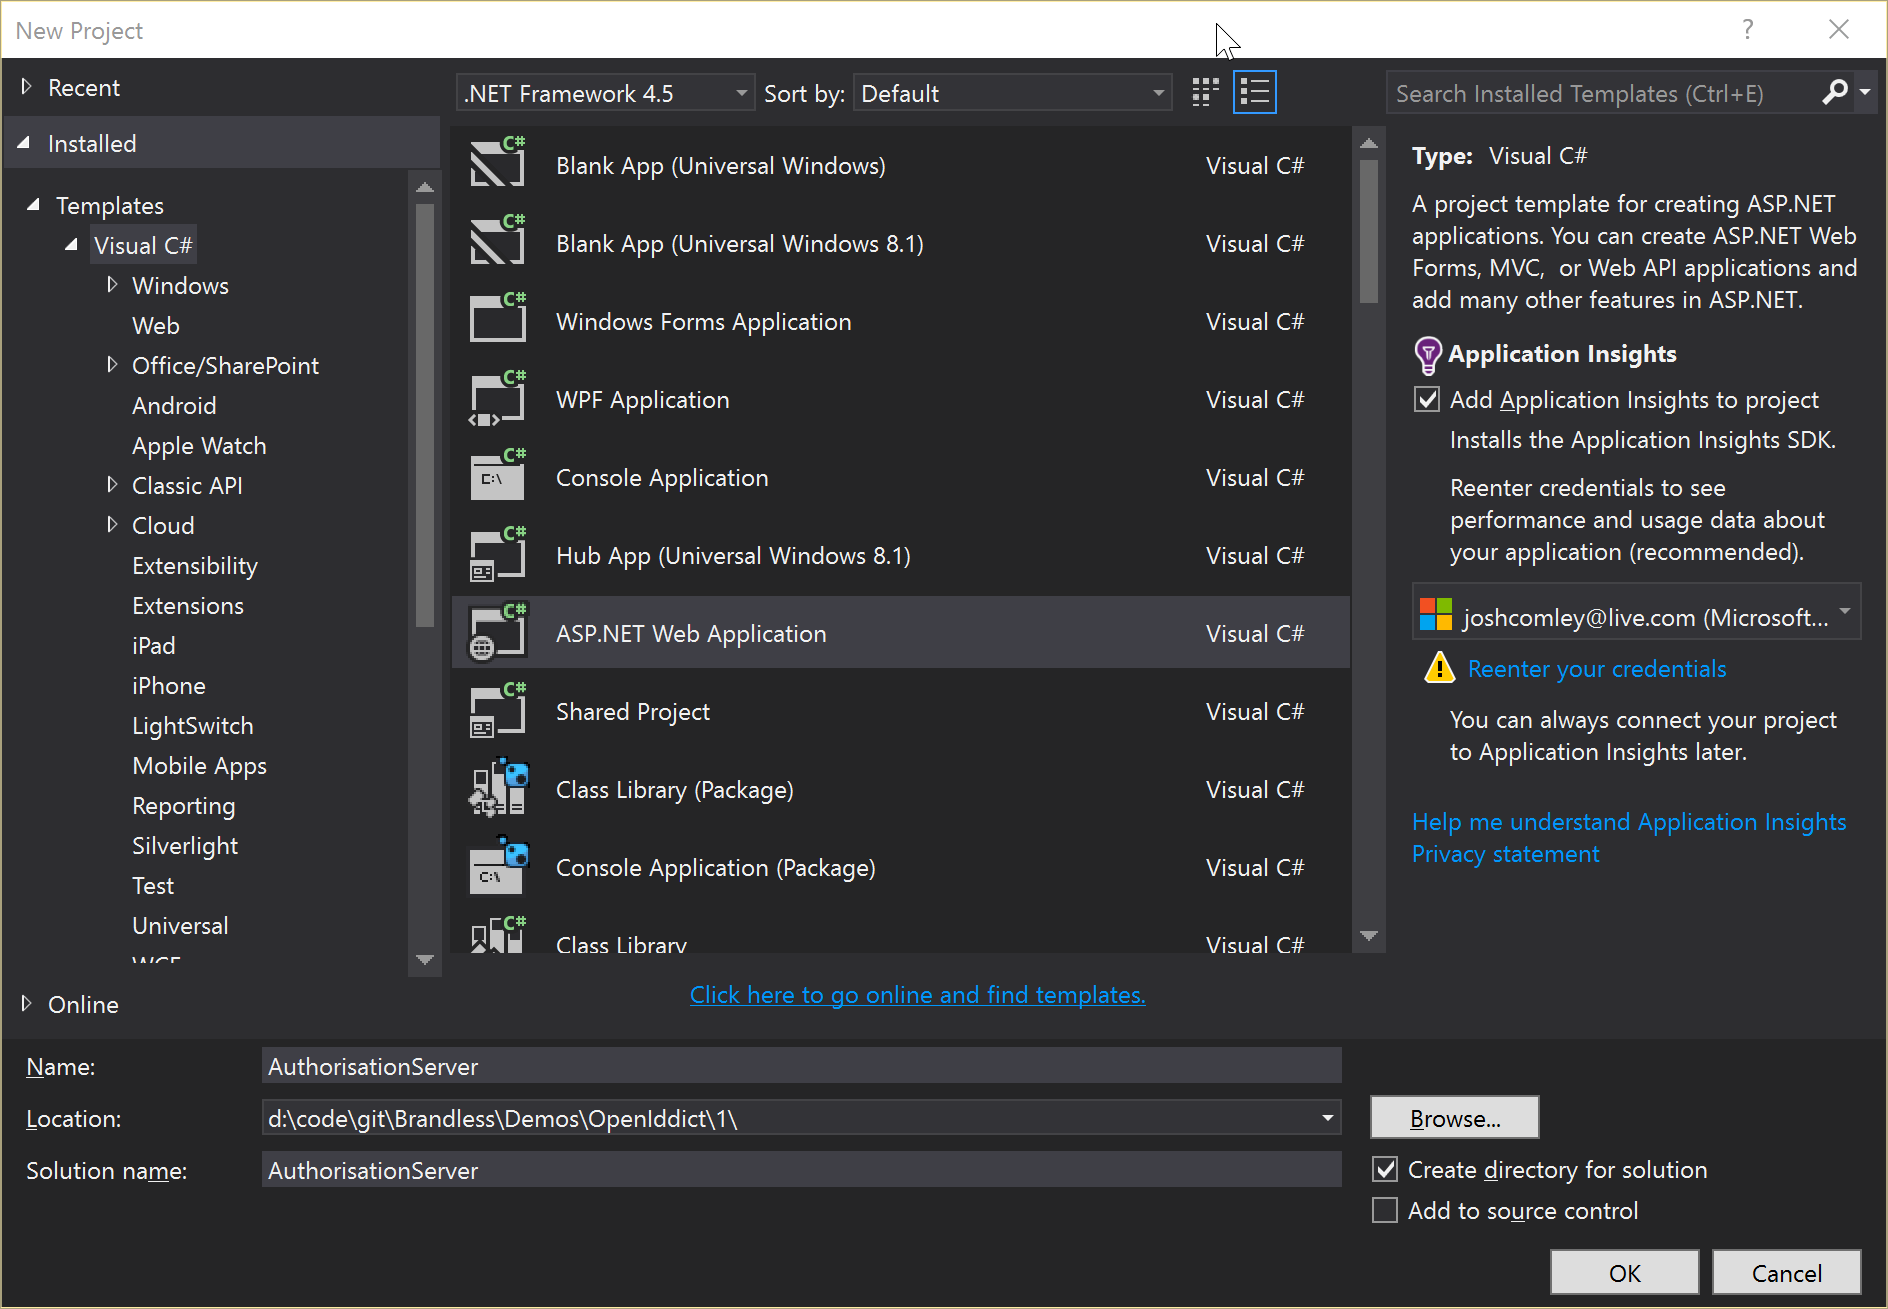
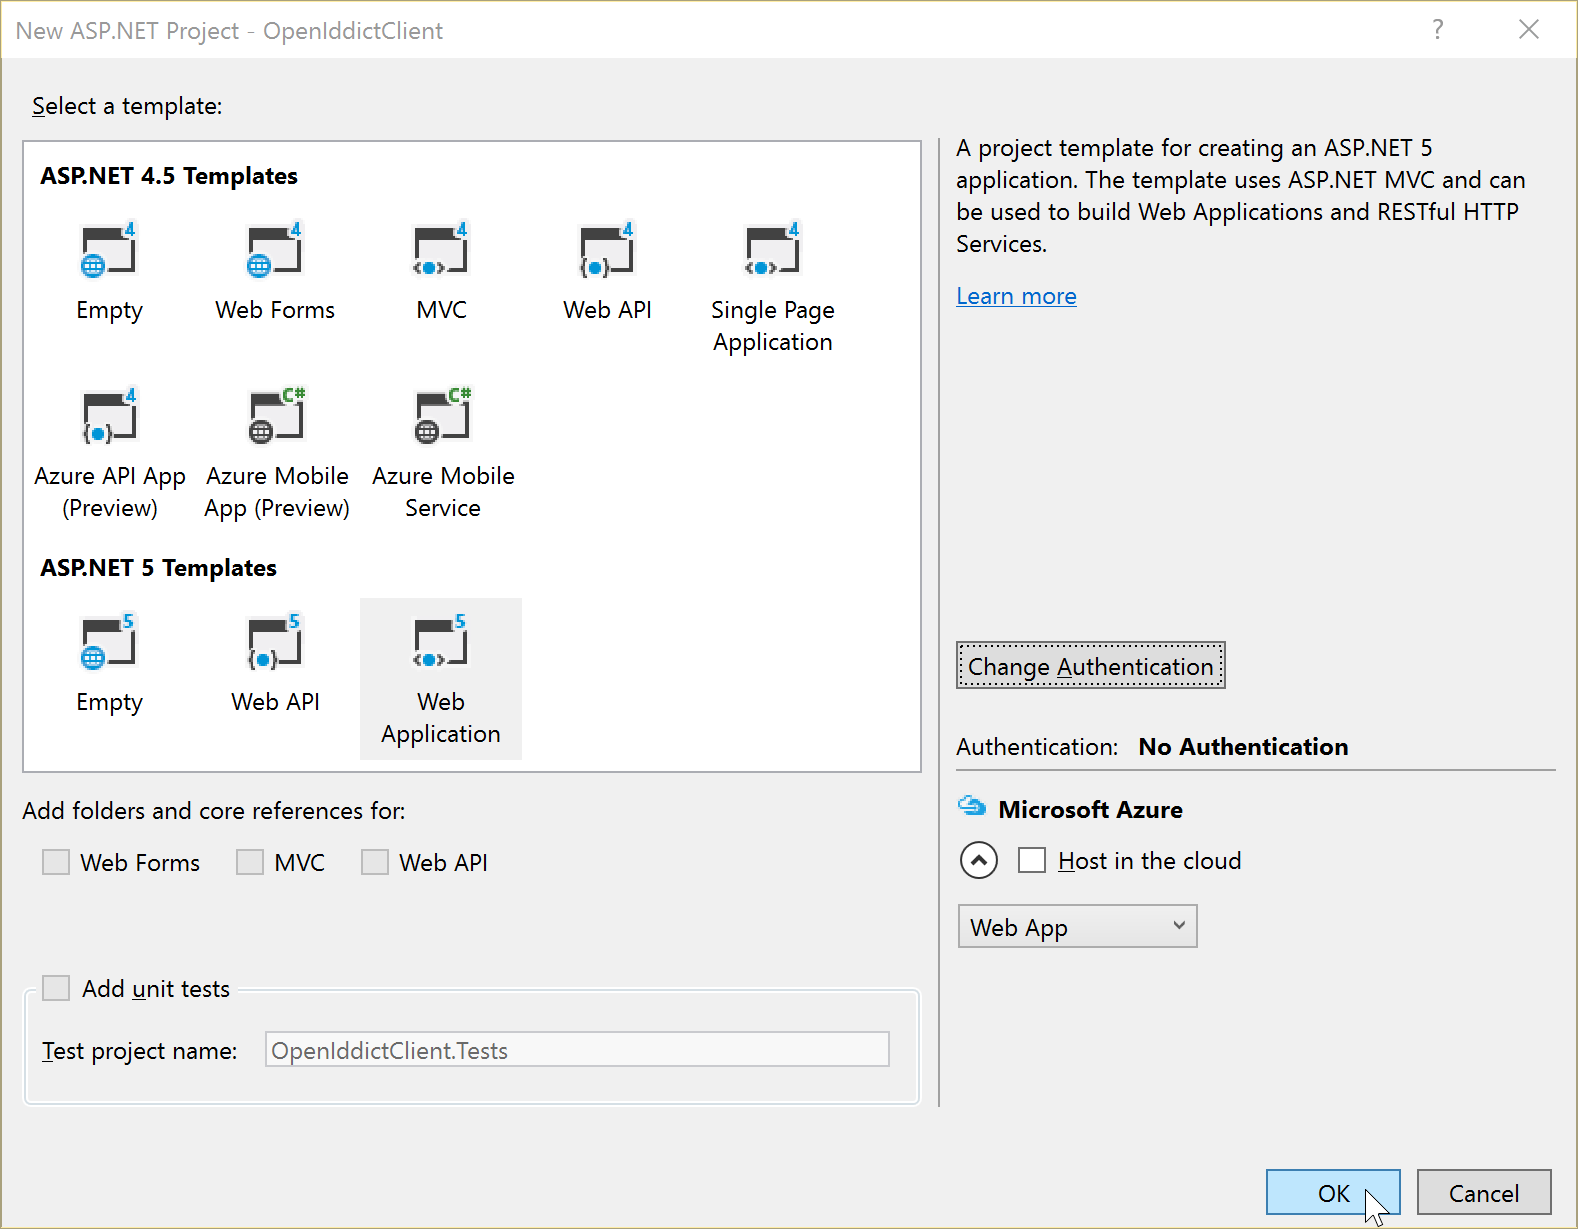
We will make this first, so as promised, fire up Visual Studio and click File -> New project and choose ASP.NET Web Application:
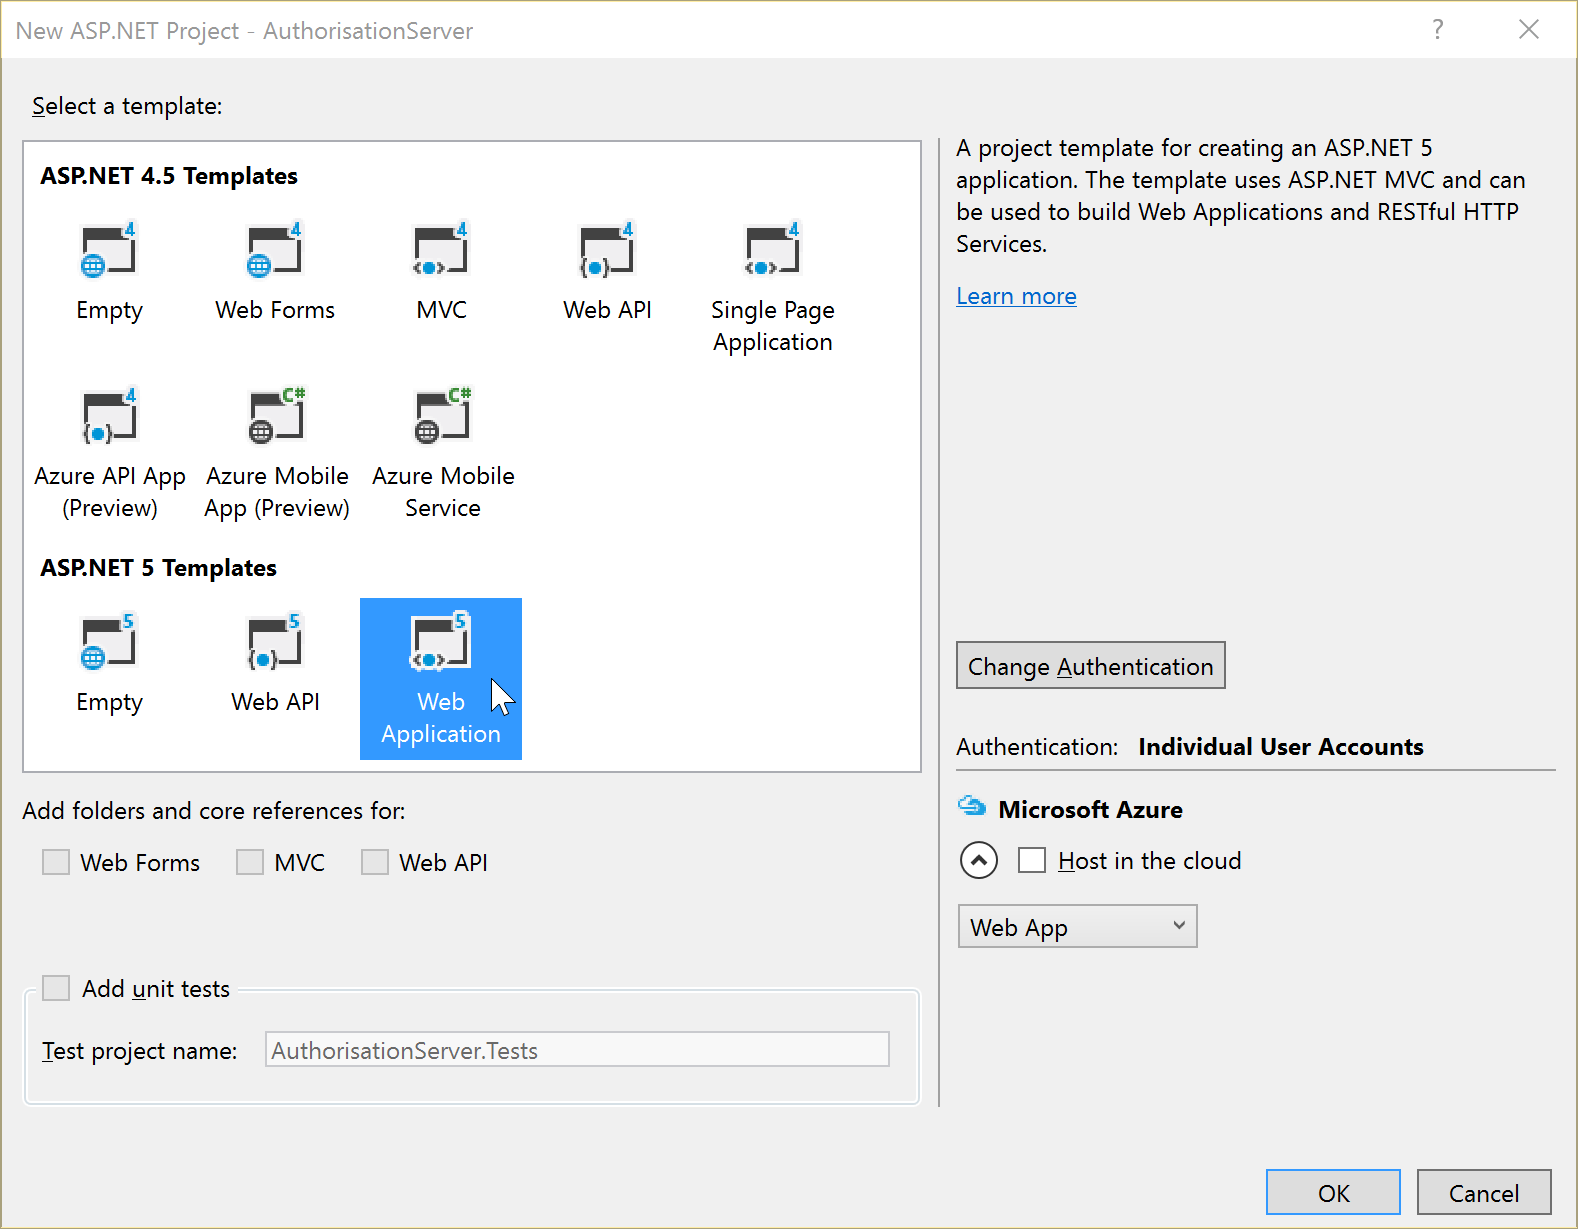
Then choose Web Application from under the ASP.NE 5 Templates section, with authentication set to Individual User Accounts which should be the default:
You should now have a nice, fresh authorisation server web application:
.png)
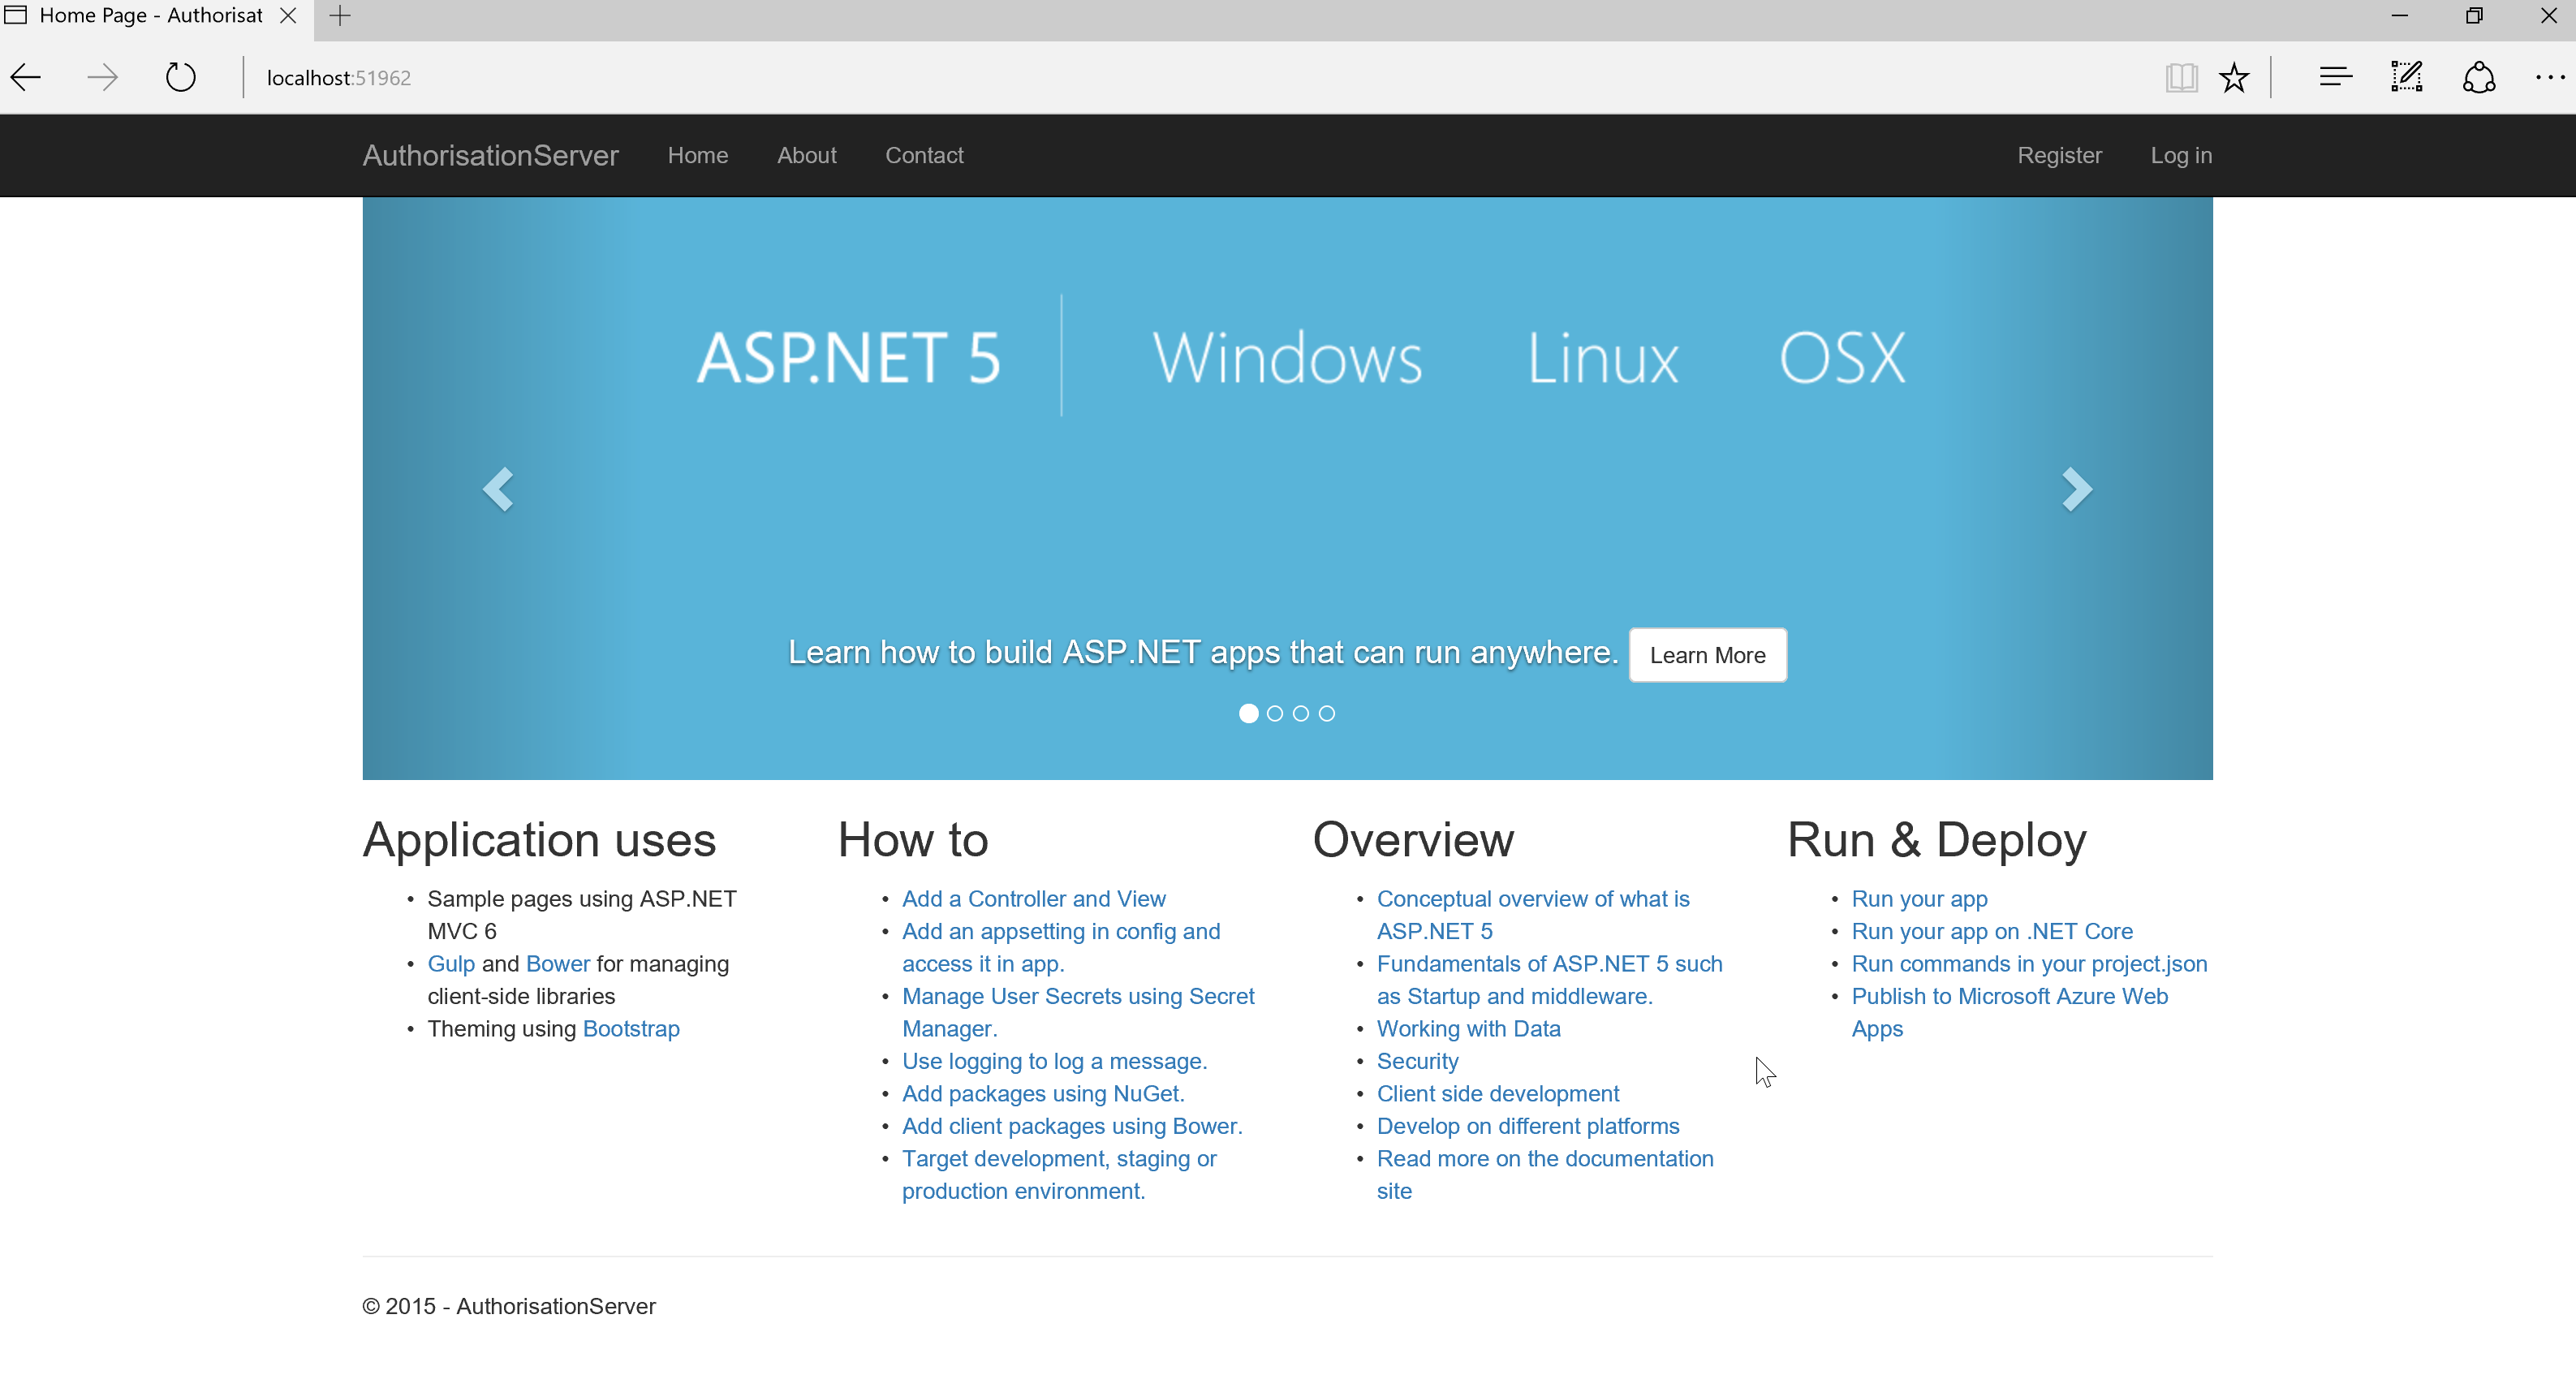
Hit Ctrl+F5 and you should see your new app running smoothly:
Now, before we go any further, at the time of typing OpenIddict uses the latest nightly builds of ASP.NET. As such we need to update our own code to use the nightly builds.
You can refer to my previous blog post on how to achieve this. Make sure you follow the tutorial carefully.
Lovely. So far, so Microsoft. Now let’s start adding the OpenIddict stuff.
Now we need to add OpenIddict to our project.json. Add the following two dependencies to your project.json:
  "dependencies": {
    "AspNet.Security.OAuth.Validation": "1.0.0-*",
    "OpenIddict": "1.0.0-*"
  }
Great, save that and OpenIddict will automagically be installed. Finally time to plug in OpenIddict in the actual code of your new web app.
First up, add the following usings to the top of your Startup.cs:
1
2
using OpenIddict;
using OpenIddict.Models;
Then, add .AddOpenIddict() to the end of the services.AddIdentity<ApplicationUser, IdentityRole>() line in ConfigureServices() method in Startup.cs (line 9 below):
1
2
3
4
5
6
7
8
9
10
public void ConfigureServices(IServiceCollection services)
{
    ...
	services.AddIdentity<ApplicationUser, IdentityRole>()
		.AddEntityFrameworkStores<ApplicationDbContext>()
		.AddDefaultTokenProviders()
		// Add this line here
		.AddOpenIddict();
    ...
}
Next up, in your Configure(..) method add the following code (from and including line 7 below). Crucially, this must be added after app.UseIdentity() is called:
1
2
3
4
5
6
7
8
9
10
public void Configure(IApplicationBuilder app, IHostingEnvironment env, ILoggerFactory loggerFactory)
{
    ...
    app.UseIdentity();

    app.UseOAuthValidation();
    // This must be *after* "app.UseIdentity();" above
    app.UseOpenIddict();
    ...
}
In that same method, ensure you replace anything that looks like this:
app.UseMvc(routes =>
{
    routes.MapRoute(
        name: "default",
        template: "{controller=Home}/{action=Index}/{id?}");
});
With this:
app.UseMvcWithDefaultRoute();Alright, that’s your authentication server configured for OpenIddict.
We haven’t configured any clients in the server yet, we will come back to do that once our client is set up and we know the details we’ll need.
Hit Ctrl+F5 again and you should see the same screen as before. Nothing should be different.
For more details on configuration options with OpenIddict, see Configuration & Options on the OpenIddict github page.
What exactly is this code going to do, then?
This code will create the endpoints necessary to receive authentication requests and issues cookies/tokens etc. Think of it as crating a listener in your app that will listen at points like:
http://localhost:1212/authenticate
You will now modify your client app so that it will send requests to these endpoints when it wants to sort things out like logging in, logging out, er, logging back in again and so on.
Client
The client app is a little more involved.
First up, File -> New project yourself an ASP.NET 5 web application:
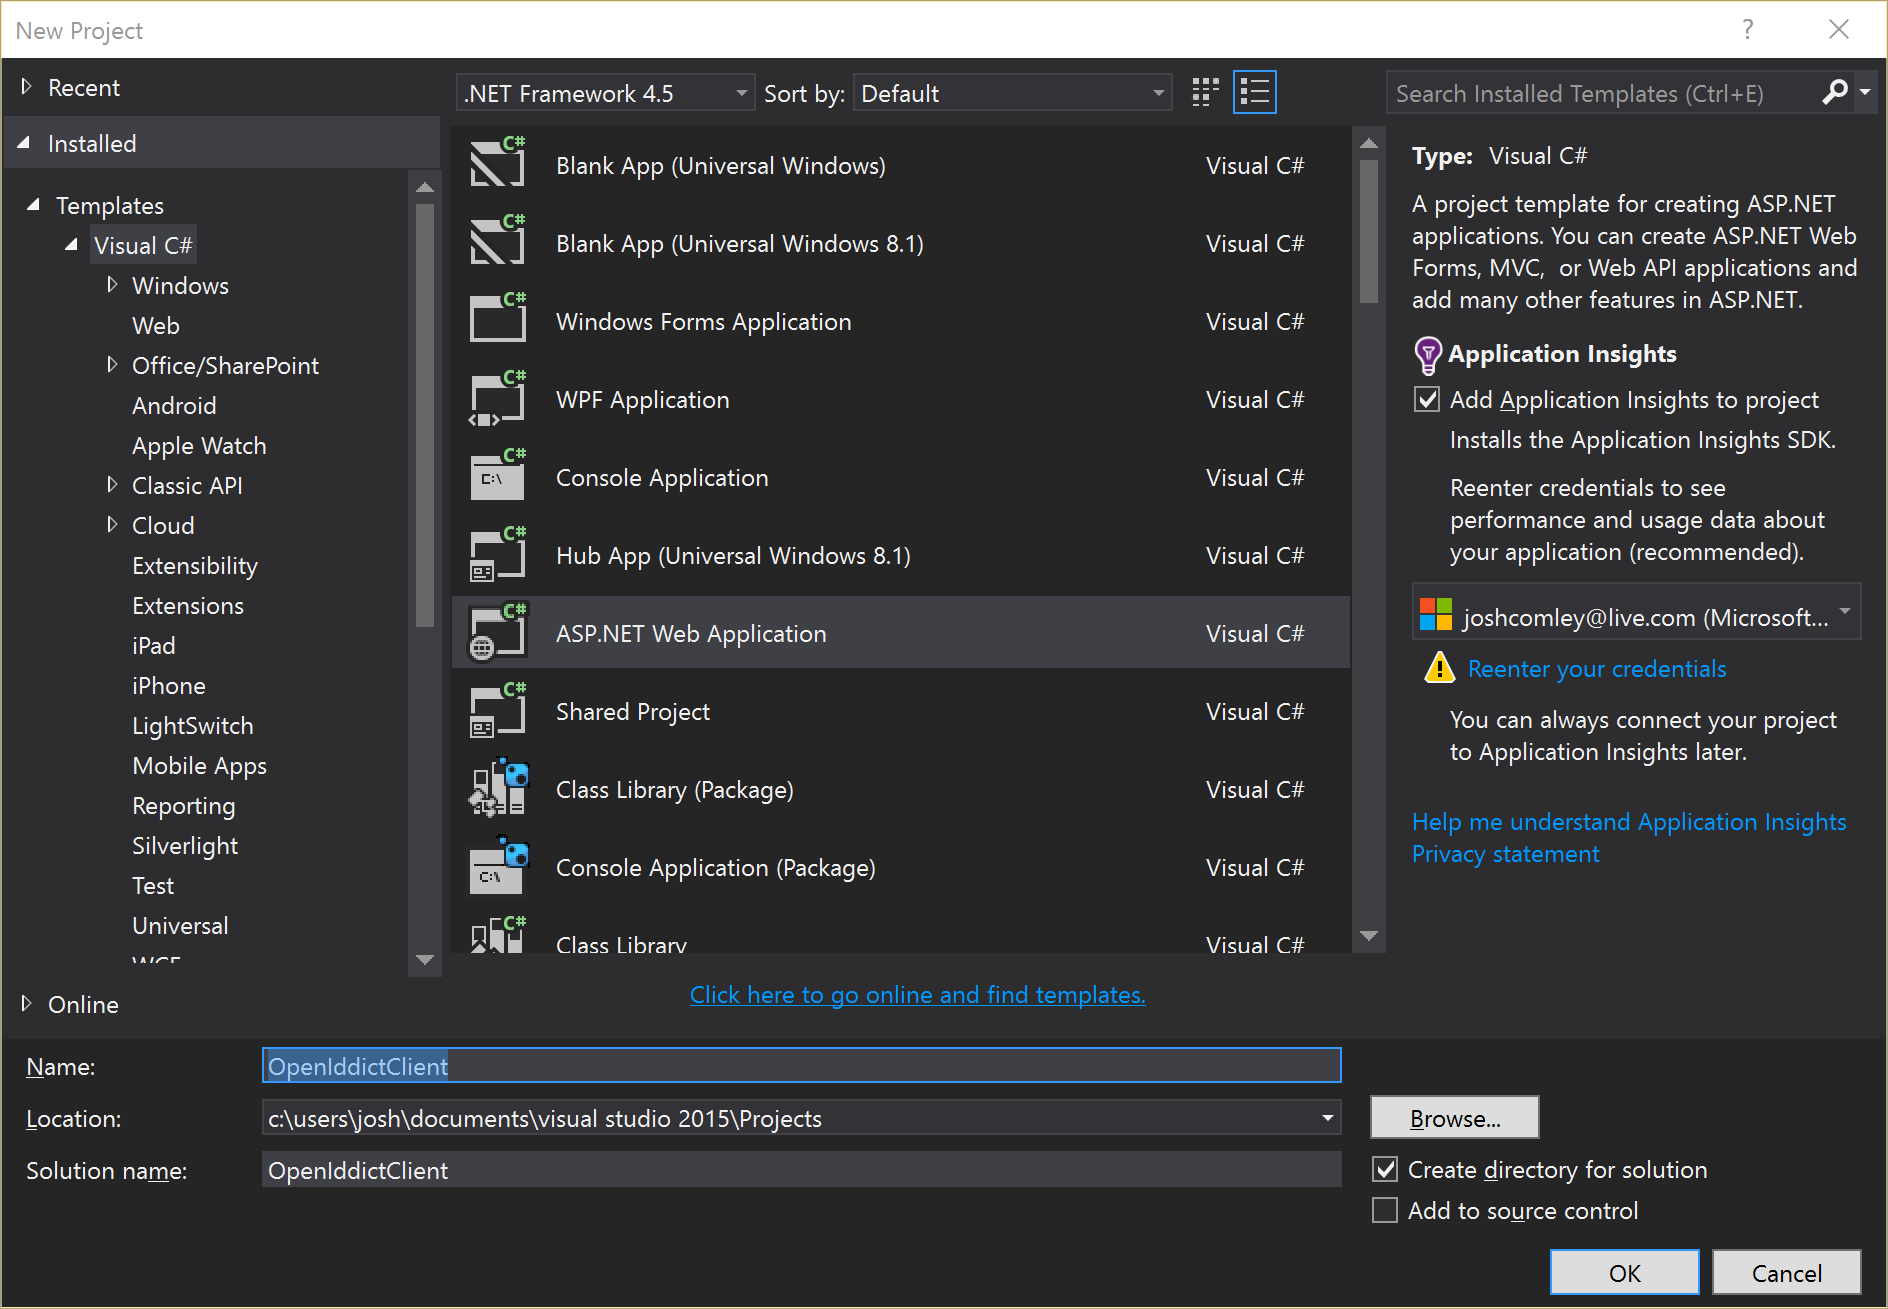
This time, however, make sure you click Change authentication and then select No authentication:
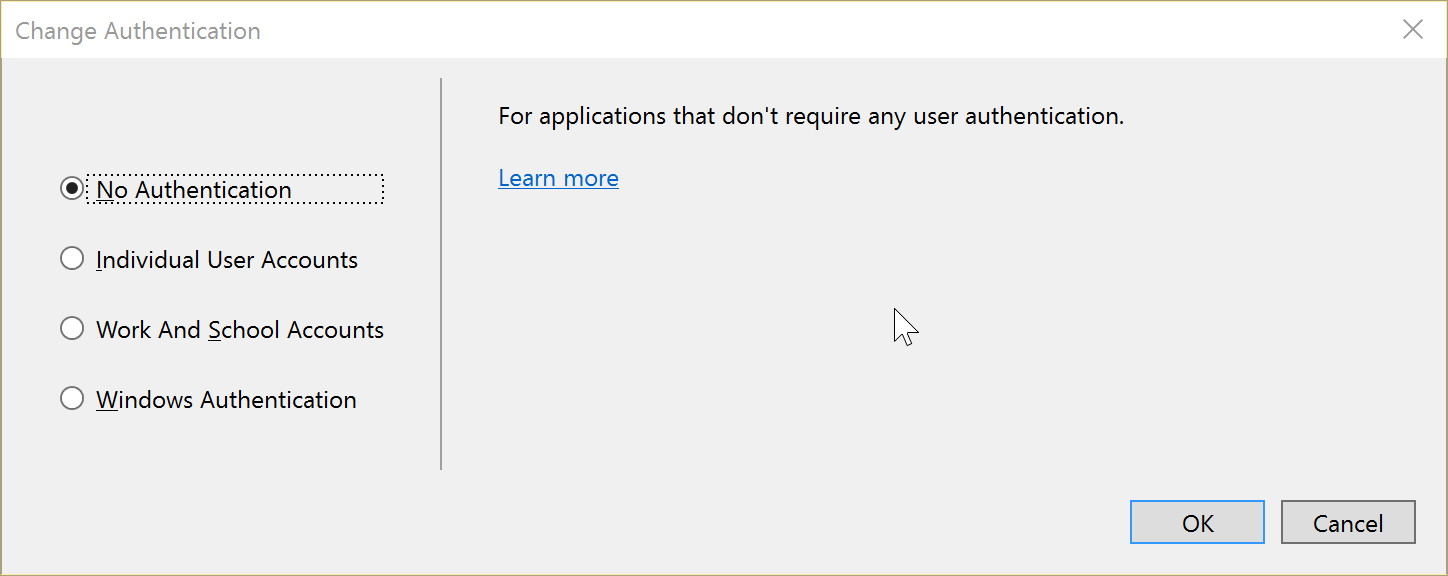
We don’t need the authentication code, because we’ll be “out sourcing” that to our OpenIddict authentication server.
RC2
At the time of writing, OpenIddict uses the RC2 nightly builds of ASP.NET 5, so just as we did with the authentication server follow my guide on moving your ASP.NET 5 project to nightly builds.
project.json
Now we need to add the companion authentication project references to our client web app. OpenIddict uses another project, by the same author, called Microsoft.AspNet.Authentication.OpenIdConnect. Add the following dependencies to your project.json:
 "dependencies": {
    "Microsoft.AspNet.Authentication.Cookies": "1.0.0-rc2-*",
    "Microsoft.AspNet.Authentication.OpenIdConnect": "1.0.0-rc2-*",
}
Startup.cs
Now in your Startup.cs, add the following using directives at the top:
using Microsoft.AspNet.Authentication;
using Microsoft.AspNet.Authentication.Cookies;
using Microsoft.AspNet.Http;
using Microsoft.IdentityModel.Protocols.OpenIdConnect;
And add the following to each of the below methods, ensuring you configure line 34 and 39 with your respective application URLs:
1
2
3
4
5
6
7
8
9
10
11
12
13
14
15
16
17
18
19
20
21
22
23
24
25
26
27
28
29
30
31
32
33
34
35
36
37
38
39
40
41
42
43
44
45
46
47
48
49
50
51
52
53
54
55
56
57
public void ConfigureServices(IServiceCollection services)
{
    // Add the below code to the top of this method
    services.Configure<SharedAuthenticationOptions>(options =>
    {
        options.SignInScheme = CookieAuthenticationDefaults.AuthenticationScheme;
    });

    services.AddAuthentication();
    ...
}

public void Configure(IApplicationBuilder app, IHostingEnvironment env, ILoggerFactory loggerFactory)
{
	...
    app.UseIISPlatformHandler();

    app.UseStaticFiles();

    // Add the following code after your calls to "app.UseIISPlatformHandler()" and
    // "app.UseStaticFiles()"

    // Insert a new cookies middleware in the pipeline to store the user
    // identity after he has been redirected from the identity provider.
    app.UseCookieAuthentication(options =>
    {
        options.AutomaticAuthenticate = true;
        options.AutomaticChallenge = true;
        options.LoginPath = new PathString("/signin");
    });

    app.UseOpenIdConnectAuthentication(options =>
    {
        var idServerUrl = YOUR_AUTHENTICATION_SERVER_URL;
        // Note: these settings must match the application details
        // inserted in the database at the server level.
        options.ClientId = YOUR_CLIENT_APP_ID;
        options.ClientSecret = YOUR_CLIENT_APP_SECRET;
        options.PostLogoutRedirectUri = YOUR_CLIENT_APP_URL;

        options.RequireHttpsMetadata = false;
        options.GetClaimsFromUserInfoEndpoint = true;
        options.SaveTokensAsClaims = true;

        // Use the authorization code flow.
        options.ResponseType = OpenIdConnectResponseTypes.Code;

        // Note: setting the Authority allows the OIDC client middleware to automatically
        // retrieve the identity provider's configuration and spare you from setting
        // the different endpoints URIs or the token validation parameters explicitly.
        options.Authority = idServerUrl;

        options.Scope.Add("email");
    });

	...
}
For the above code to compile, you’ll need to fill in the following variables:
- YOUR_CLIENT_APP_ID
- This is just the ID of your client, and it cannot contain spaces. For safety, best to just stick to letters. For now you can just use something like “MyClient”, nice and professinal, like.
- YOUR_CLIENT_APP_SECRET
- Again, we’re just getting this up and running so choose anything, but for production apps ensure this is kept absolutely private and is impossible to guess. Best to just use a random guid.
- YOUR_CLIENT_APP_URL
- This is just the URL your client app is running at, for now it’s likely some localhost URL
- YOUR_AUTHENTICATION_SERVER_URL
- This is the URL of your authrozation server we configured earlier, again likely to be some localhost URL
Create a login page
Either replace the contents of your existing Index.cshtml with the following, or create a new page with the following cshtml code:
@{
ViewData["Title"] = "Home Page";
}
@if (User?.Identity?.IsAuthenticated ?? false)
{
<h1>Welcome, @User.Identity.Name</h1>
<a class="btn btn-lg btn-danger" href="/signout">Sign out</a>
}
else
{
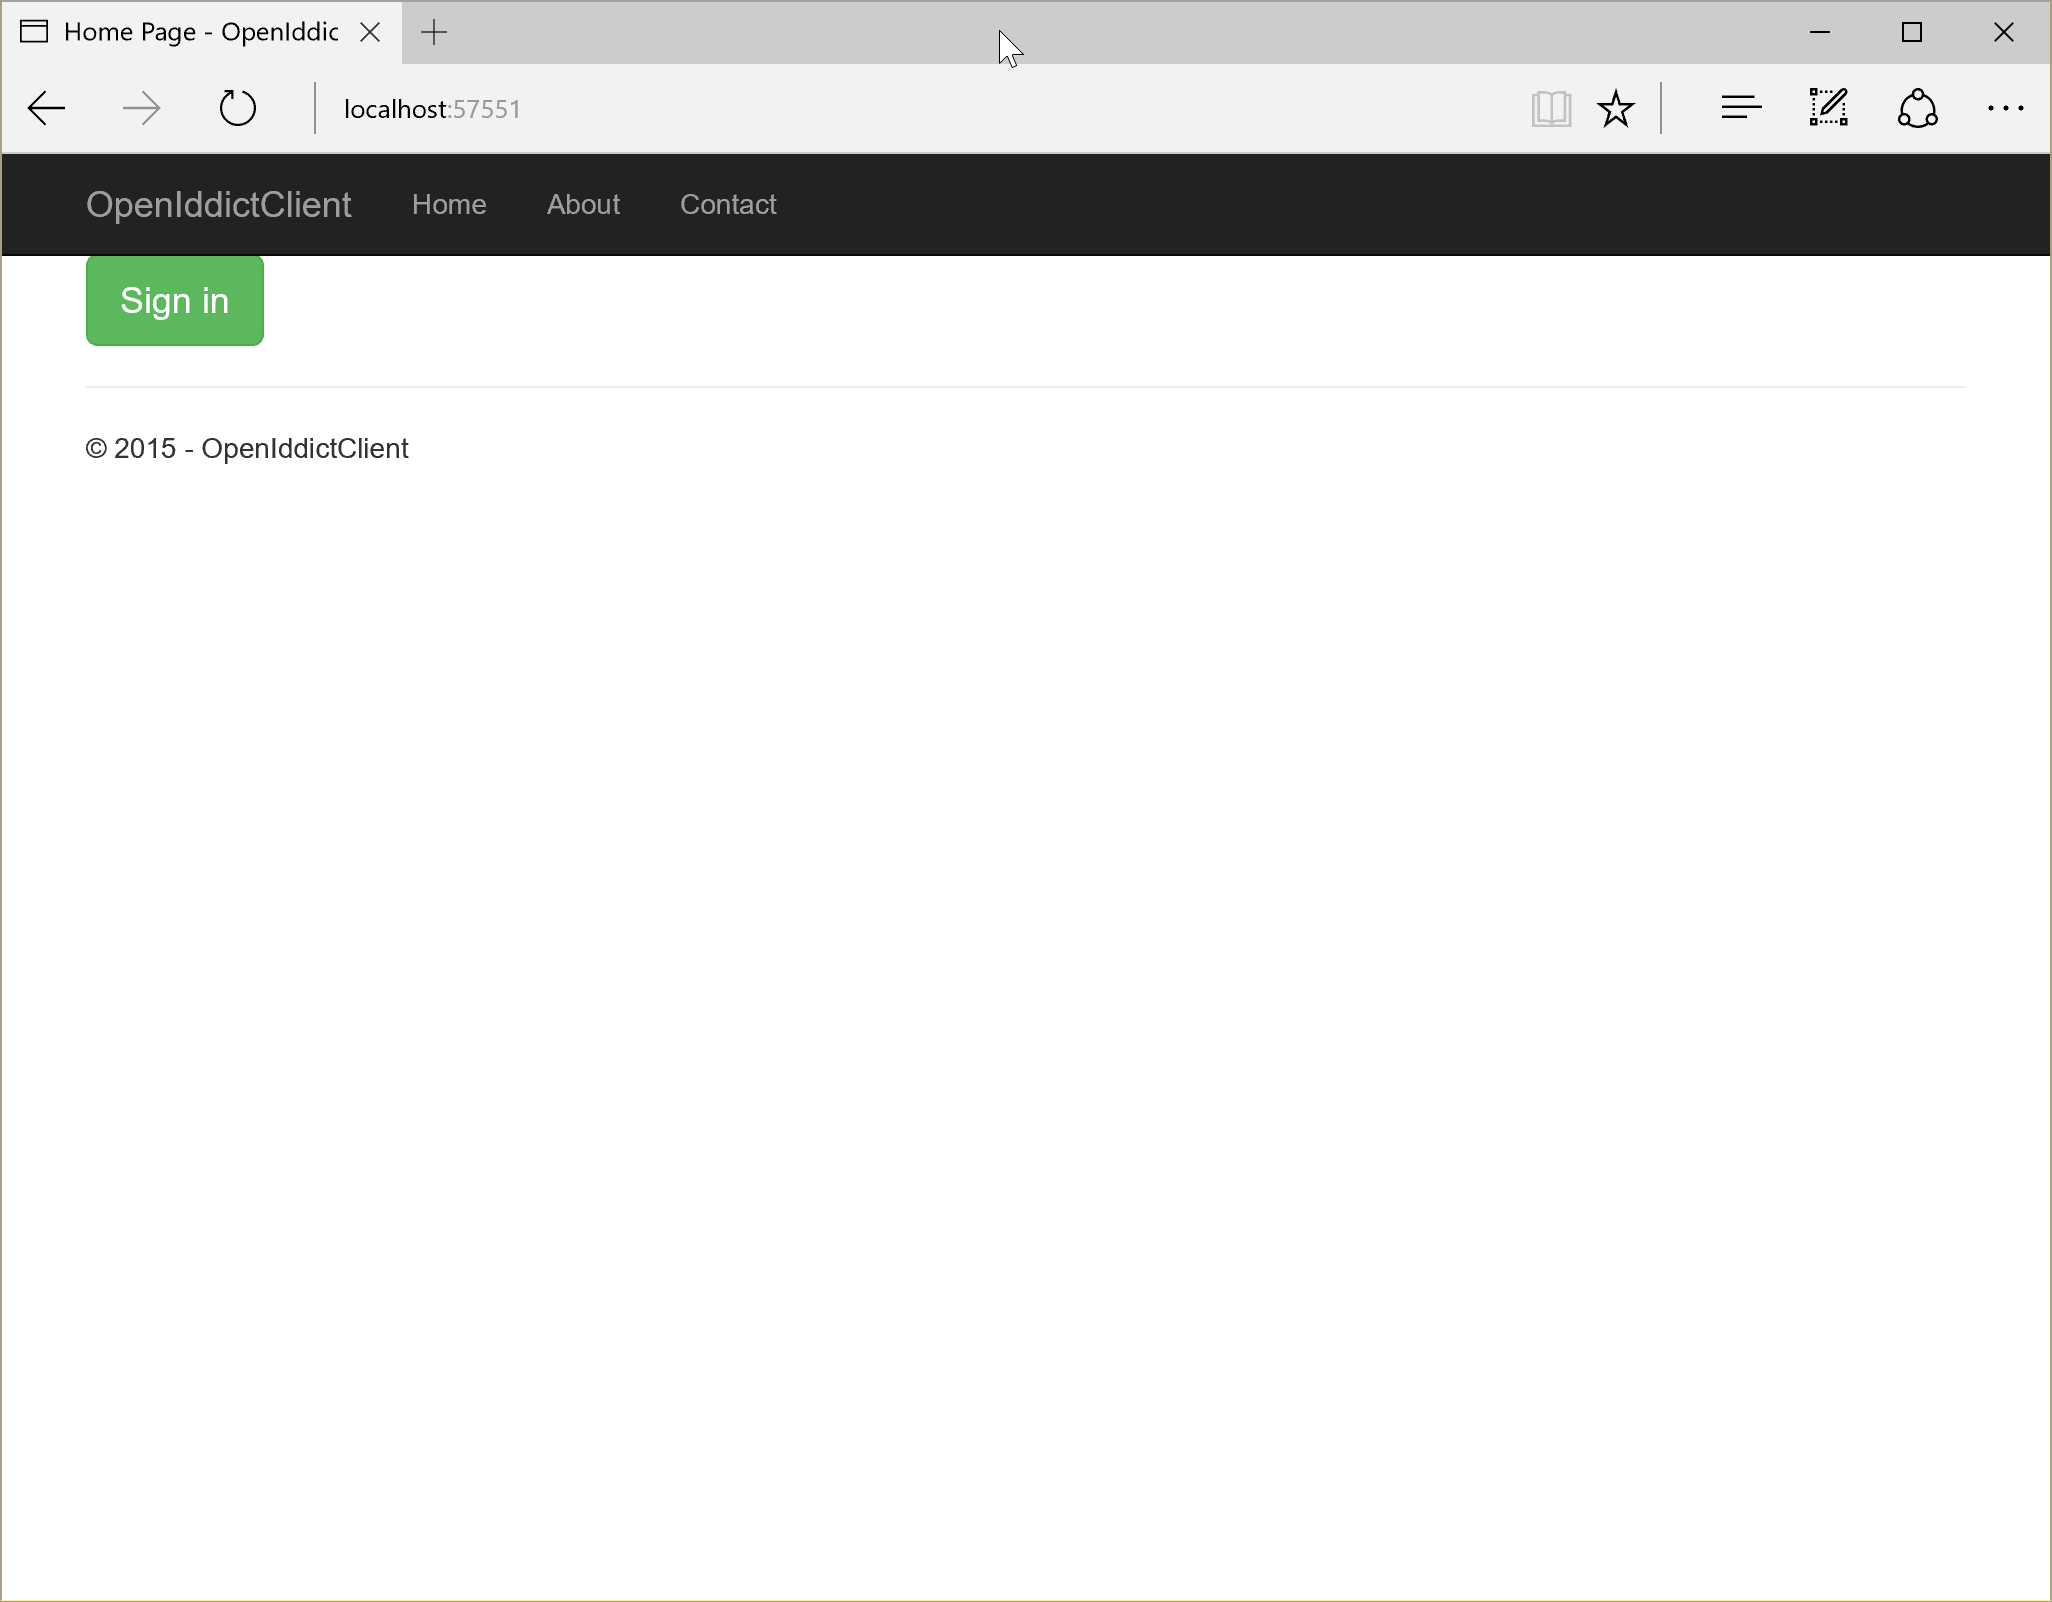
<a class="btn btn-lg btn-success" href="/home/signin">Sign in</a>
}Now add the following usings and methods to the controller for the above cshtml file:
using Microsoft.AspNet.Authentication.Cookies;
using Microsoft.AspNet.Authentication.OpenIdConnect;
using Microsoft.AspNet.Http.Authentication;

...

public IActionResult SignIn()
{
    return new ChallengeResult(OpenIdConnectDefaults.AuthenticationScheme, new AuthenticationProperties
    {
        RedirectUri = "/"
    });
}

[HttpGet("~/signout"), HttpPost("~/signout")]
public async Task SignOut()
{
    // Instruct the cookies middleware to delete the local cookie created when the user agent
    // is redirected from the identity provider after a successful authorization flow.
    await HttpContext.Authentication.SignOutAsync(CookieAuthenticationDefaults.AuthenticationScheme);

    // Instruct the OpenID Connect middleware to redirect the user agent to the identity provider to sign out.
    await HttpContext.Authentication.SignOutAsync(OpenIdConnectDefaults.AuthenticationScheme);
}
The SignOut() method above can be in any controller, because we’ve mapped a specific route, which is the relative route ~/signout to always go to this action.
Now, hit Ctrl+F5 and you should see a nice big green Sign in button:
Before we click it…
Back to the authorisation server project
…we need to dip back into our authorisation server to configure our new clientn app.
The first thing we need to do is make our data context inherit from OpenIddictContext. So open up your ApplicationDbContext.cs and add the following using:
using OpenIddict;Then change the class definition to this:
public class ApplicationDbContext : OpenIddictContext<ApplicationUser>Then add the following method:
private static bool _databaseChecked;
// The following code creates the database and schema if they don't exist.
// This is a temporary workaround since deploying database through EF migrations is
// not yet supported in this release.
// Please see this http://go.microsoft.com/fwlink/?LinkID=615859 for more information on how to do deploy the database
// when publishing your application.
public void EnsureDatabaseCreated()
{
    if (!_databaseChecked)
    {
        _databaseChecked = true;
        this.Database.EnsureCreated();
    }
}
Your final class should look something like this:
public class ApplicationDbContext : OpenIddictContext<ApplicationUser>
{
    protected override void OnModelCreating(ModelBuilder builder)
    {
        base.OnModelCreating(builder);
        // Customize the ASP.NET Identity model and override the defaults if needed.
        // For example, you can rename the ASP.NET Identity table names and more.
        // Add your customizations after calling base.OnModelCreating(builder);
    }

    private static bool _databaseChecked;
    // The following code creates the database and schema if they don't exist.
    // This is a temporary workaround since deploying database through EF migrations is
    // not yet supported in this release.
    // Please see this http://go.microsoft.com/fwlink/?LinkID=615859 for more information on how to do deploy the database
    // when publishing your application.
    public void EnsureDatabaseCreated()
    {
        if (!_databaseChecked)
        {
            _databaseChecked = true;
            this.Database.EnsureCreated();
        }
    }
}
Now open up your AccountController.cs.
This next part is a bit of a hack for now, as we need to ensure that the database is created and ready for OpenIddict to use when account stuff happens.
Firstly, we need to pass in our data context into our AccountController now because we’re going to be looking up clients etc. so add ApplicationDbContext to your constructor and save a reference to it in a private field named _applicationDbContext. Your new constructor should look something like the following:
// Create this private field
private readonly ApplicationDbContext _applicationDbContext;

public AccountController(
    UserManager<ApplicationUser> userManager,
    SignInManager<ApplicationUser> signInManager,
    IEmailSender emailSender,
    ISmsSender smsSender,
    ILoggerFactory loggerFactory,
    // Add this in
    ApplicationDbContext applicationDbContext)
{
    _userManager = userManager;
    _signInManager = signInManager;
    _emailSender = emailSender;
    _smsSender = smsSender;
    _logger = loggerFactory.CreateLogger<AccountController>();
    // Save a reference to it
    _applicationDbContext = applicationDbContext;
}
Now add the following line to the top of each of the below three methods:
//
// POST: /Account/Register
[HttpPost]
[AllowAnonymous]
[ValidateAntiForgeryToken]
public async Task<IActionResult> Register(RegisterViewModel model)
{
    _applicationDbContext.EnsureDatabaseCreated();
    ...
}

//
// POST: /Account/ExternalLogin
[HttpPost]
[AllowAnonymous]
[ValidateAntiForgeryToken]
public IActionResult ExternalLogin(string provider, string returnUrl = null)
{
    _applicationDbContext.EnsureDatabaseCreated();
    ...
}

//
// POST: /Account/Login
[HttpPost]
[AllowAnonymous]
[ValidateAntiForgeryToken]
public async Task<IActionResult> Login(LoginViewModel model, string returnUrl = null)
{
    _applicationDbContext.EnsureDatabaseCreated();
    ...
}
Now, open up your authorisation server’s Startup.cs again and add the following code beneath app.UseOpenIddict():
using (var context = app.ApplicationServices.GetRequiredService<ApplicationDbContext>())
{
    context.Database.EnsureCreated();

    // Add Mvc.Client to the known applications.
    if (!context.Applications.Any())
    {
        // Note: when using the introspection middleware, your resource server
        // MUST be registered as an OAuth2 client and have valid credentials.
        //
        // context.Applications.Add(new Application {
        //     Id = "resource_server",
        //     DisplayName = "Main resource server",
        //     Secret = "875sqd4s5d748z78z7ds1ff8zz8814ff88ed8ea4z4zzd"
        // });

        context.Applications.Add(new Application
        {
            Id = YOUR_CLIENT_APP_ID,
            DisplayName = "My client application",
            RedirectUri = YOUR_CLIENT_APP_URL + "/signin-oidc",
            LogoutRedirectUri = YOUR_CLIENT_APP_URL,
            Secret = Crypto.HashPassword(YOUR_CLIENT_APP_SECRET),
            Type = OpenIddictConstants.ApplicationTypes.Confidential
        });

        context.SaveChanges();
    }
}
Again, you’ll need to fill in the variables for YOUR_CLIENT_APP_URL, YOUR_CLIENT_APP_ID and YOUR_CLIENT_APP_SECRET exactly as before.
For now, we’re hardcoding seeding our client app into our authorisation server’s database. Later you might want to refactor this out.
Finally, we’ll need to run migrations on our database to get the OpenIddict tables in there.
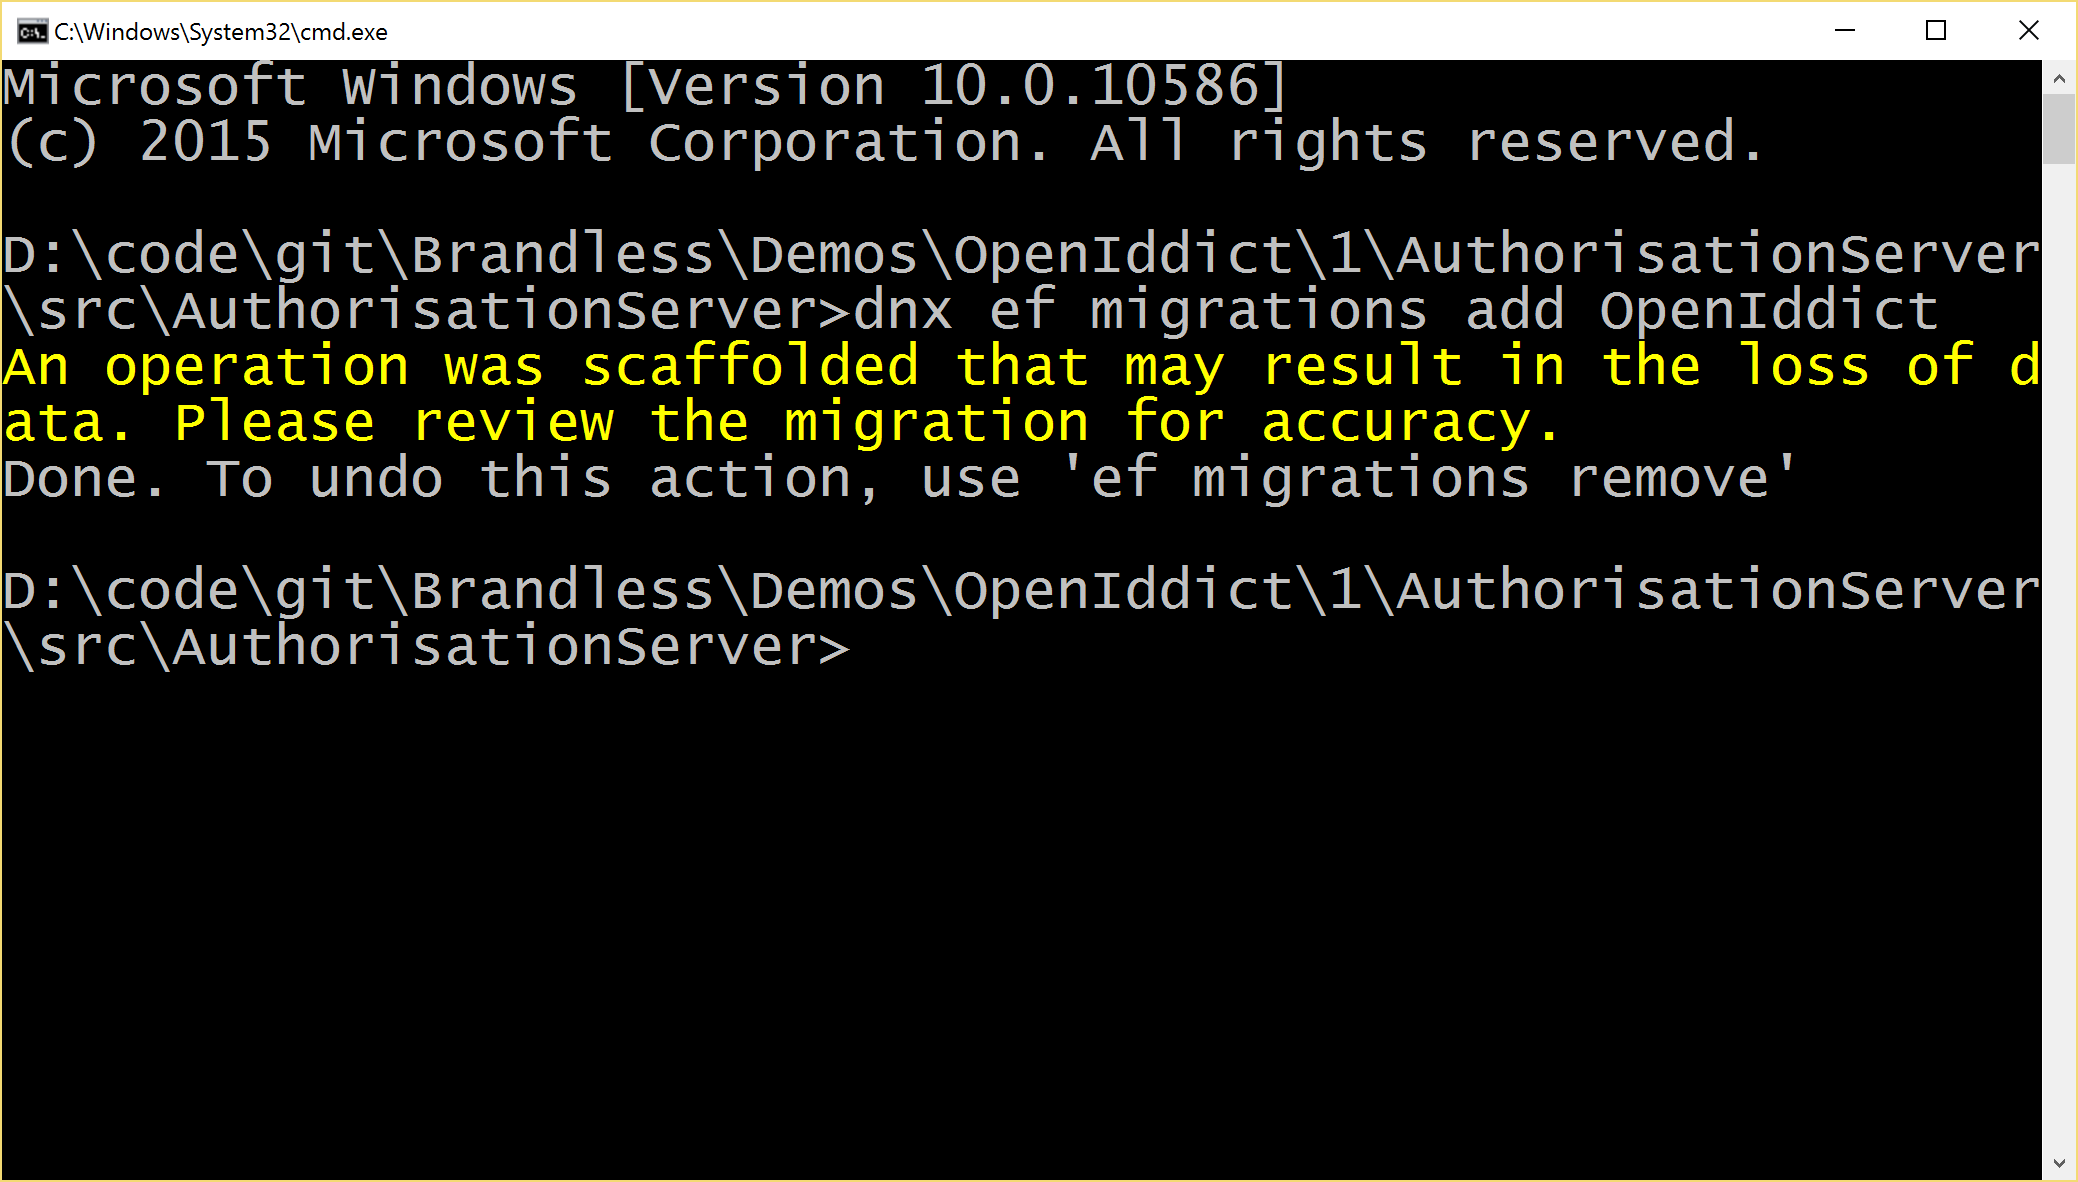
Open up a command prompt at your authorisation server’s project folder and run the following command:
dnx ef migrations add OpenIddict
You will see this error, we’ll deal with this in a moment:
You should now see a new file in your solution explorer:
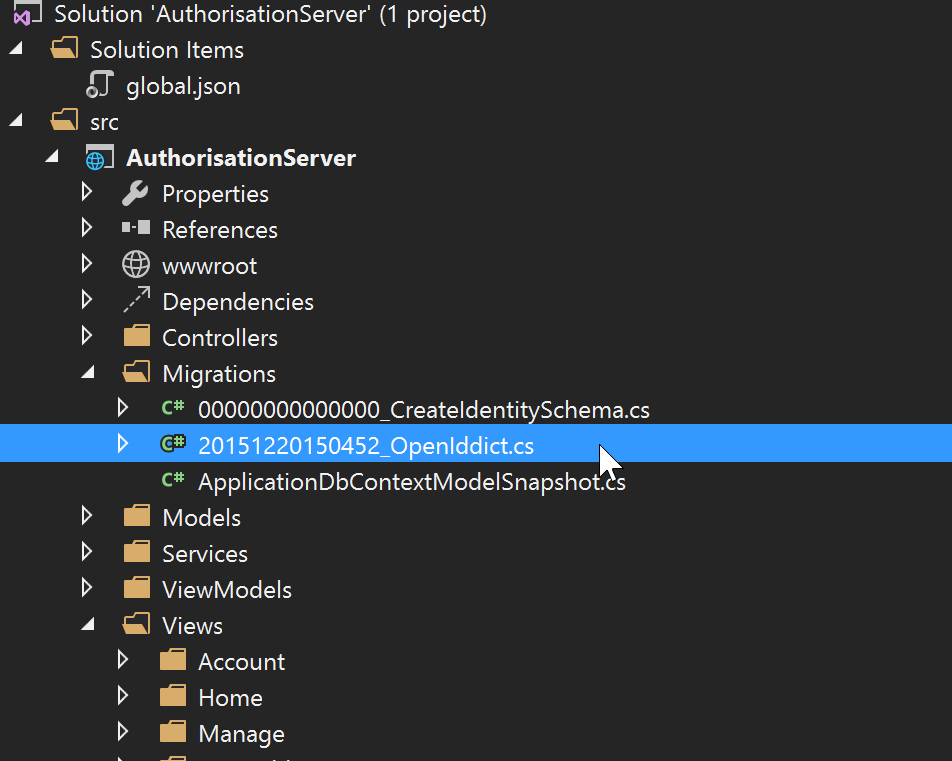
We need to fix up the auto-generated migration a little.
There will be lots of entries like this:
migrationBuilder.DropForeignKey(
    name: "FK_AspNetUserRoles_AspNetUsers_UserId",
    table: "AspNetUserRoles");
Delete from this migration’s Up(..) and Down(..) methods any entries that reference any AspNetXXX tables.
You should end up with a migration class that looks more or less like this, but it might vary as OpenIddict changes:
public partial class OpenIddict : Migration
{
    protected override void Up(MigrationBuilder migrationBuilder)
    {
        migrationBuilder.CreateTable(
            name: "Application",
            columns: table => new
            {
                Id = table.Column<string>(nullable: false),
                DisplayName = table.Column<string>(nullable: true),
                LogoutRedirectUri = table.Column<string>(nullable: true),
                RedirectUri = table.Column<string>(nullable: true),
                Secret = table.Column<string>(nullable: true),
                Type = table.Column<string>(nullable: true)
            },
            constraints: table =>
            {
                table.PrimaryKey("PK_Application", x => x.Id);
            });
    }

    protected override void Down(MigrationBuilder migrationBuilder)
    {
        migrationBuilder.DropTable(
            name: "Application");
    }
}
Now be sure to recompile your whole project before the next step, because we’re going to run the migrations, but the migration running code doesn’t compile your project for you, so if you forget you’ll be using the old migrations.
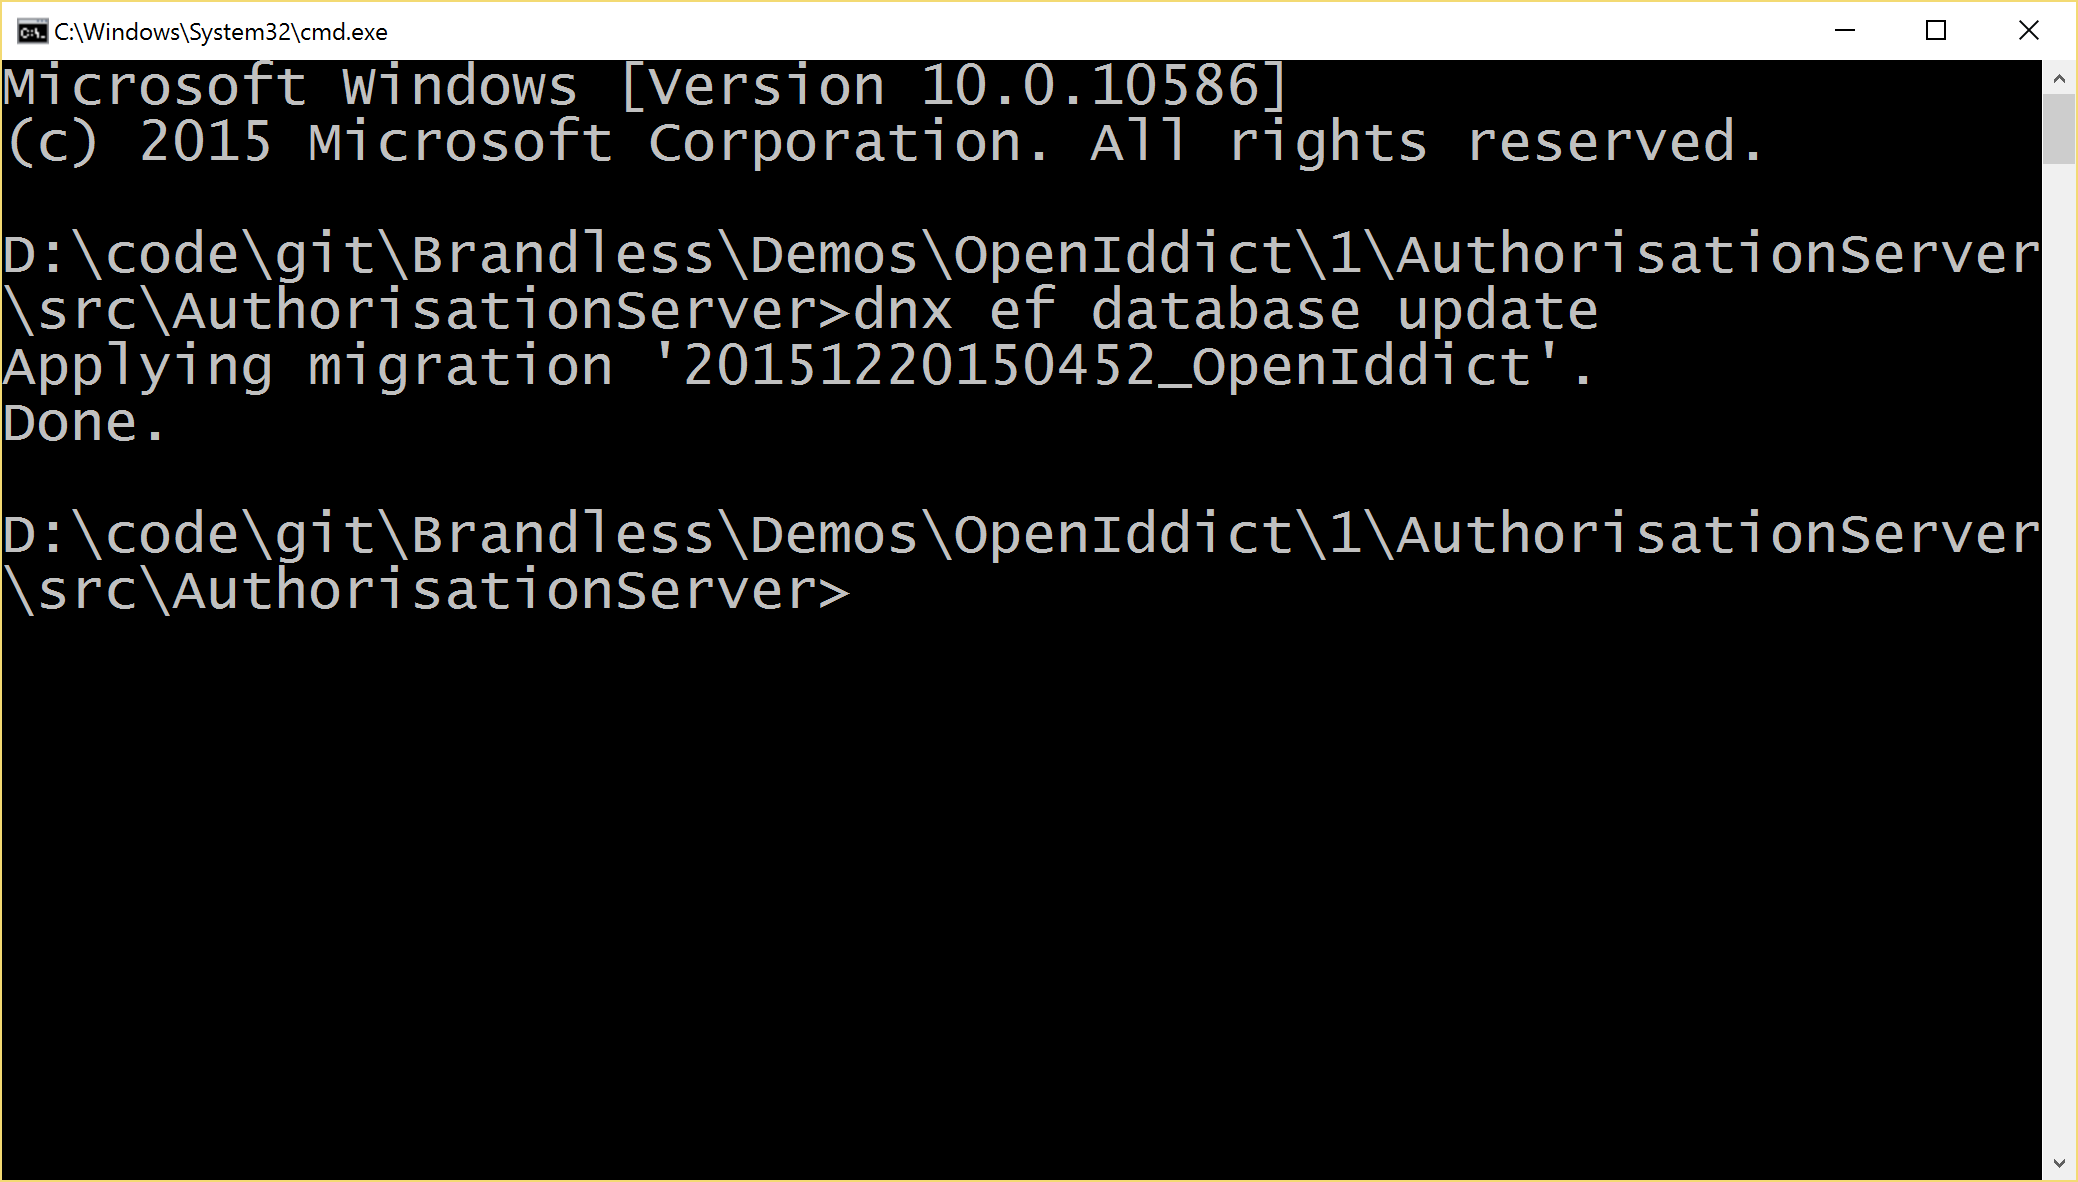
Now, go back to command prompt at your authorisation server’s project folder and run the following command:
dnx ef database update
You should see something like this:
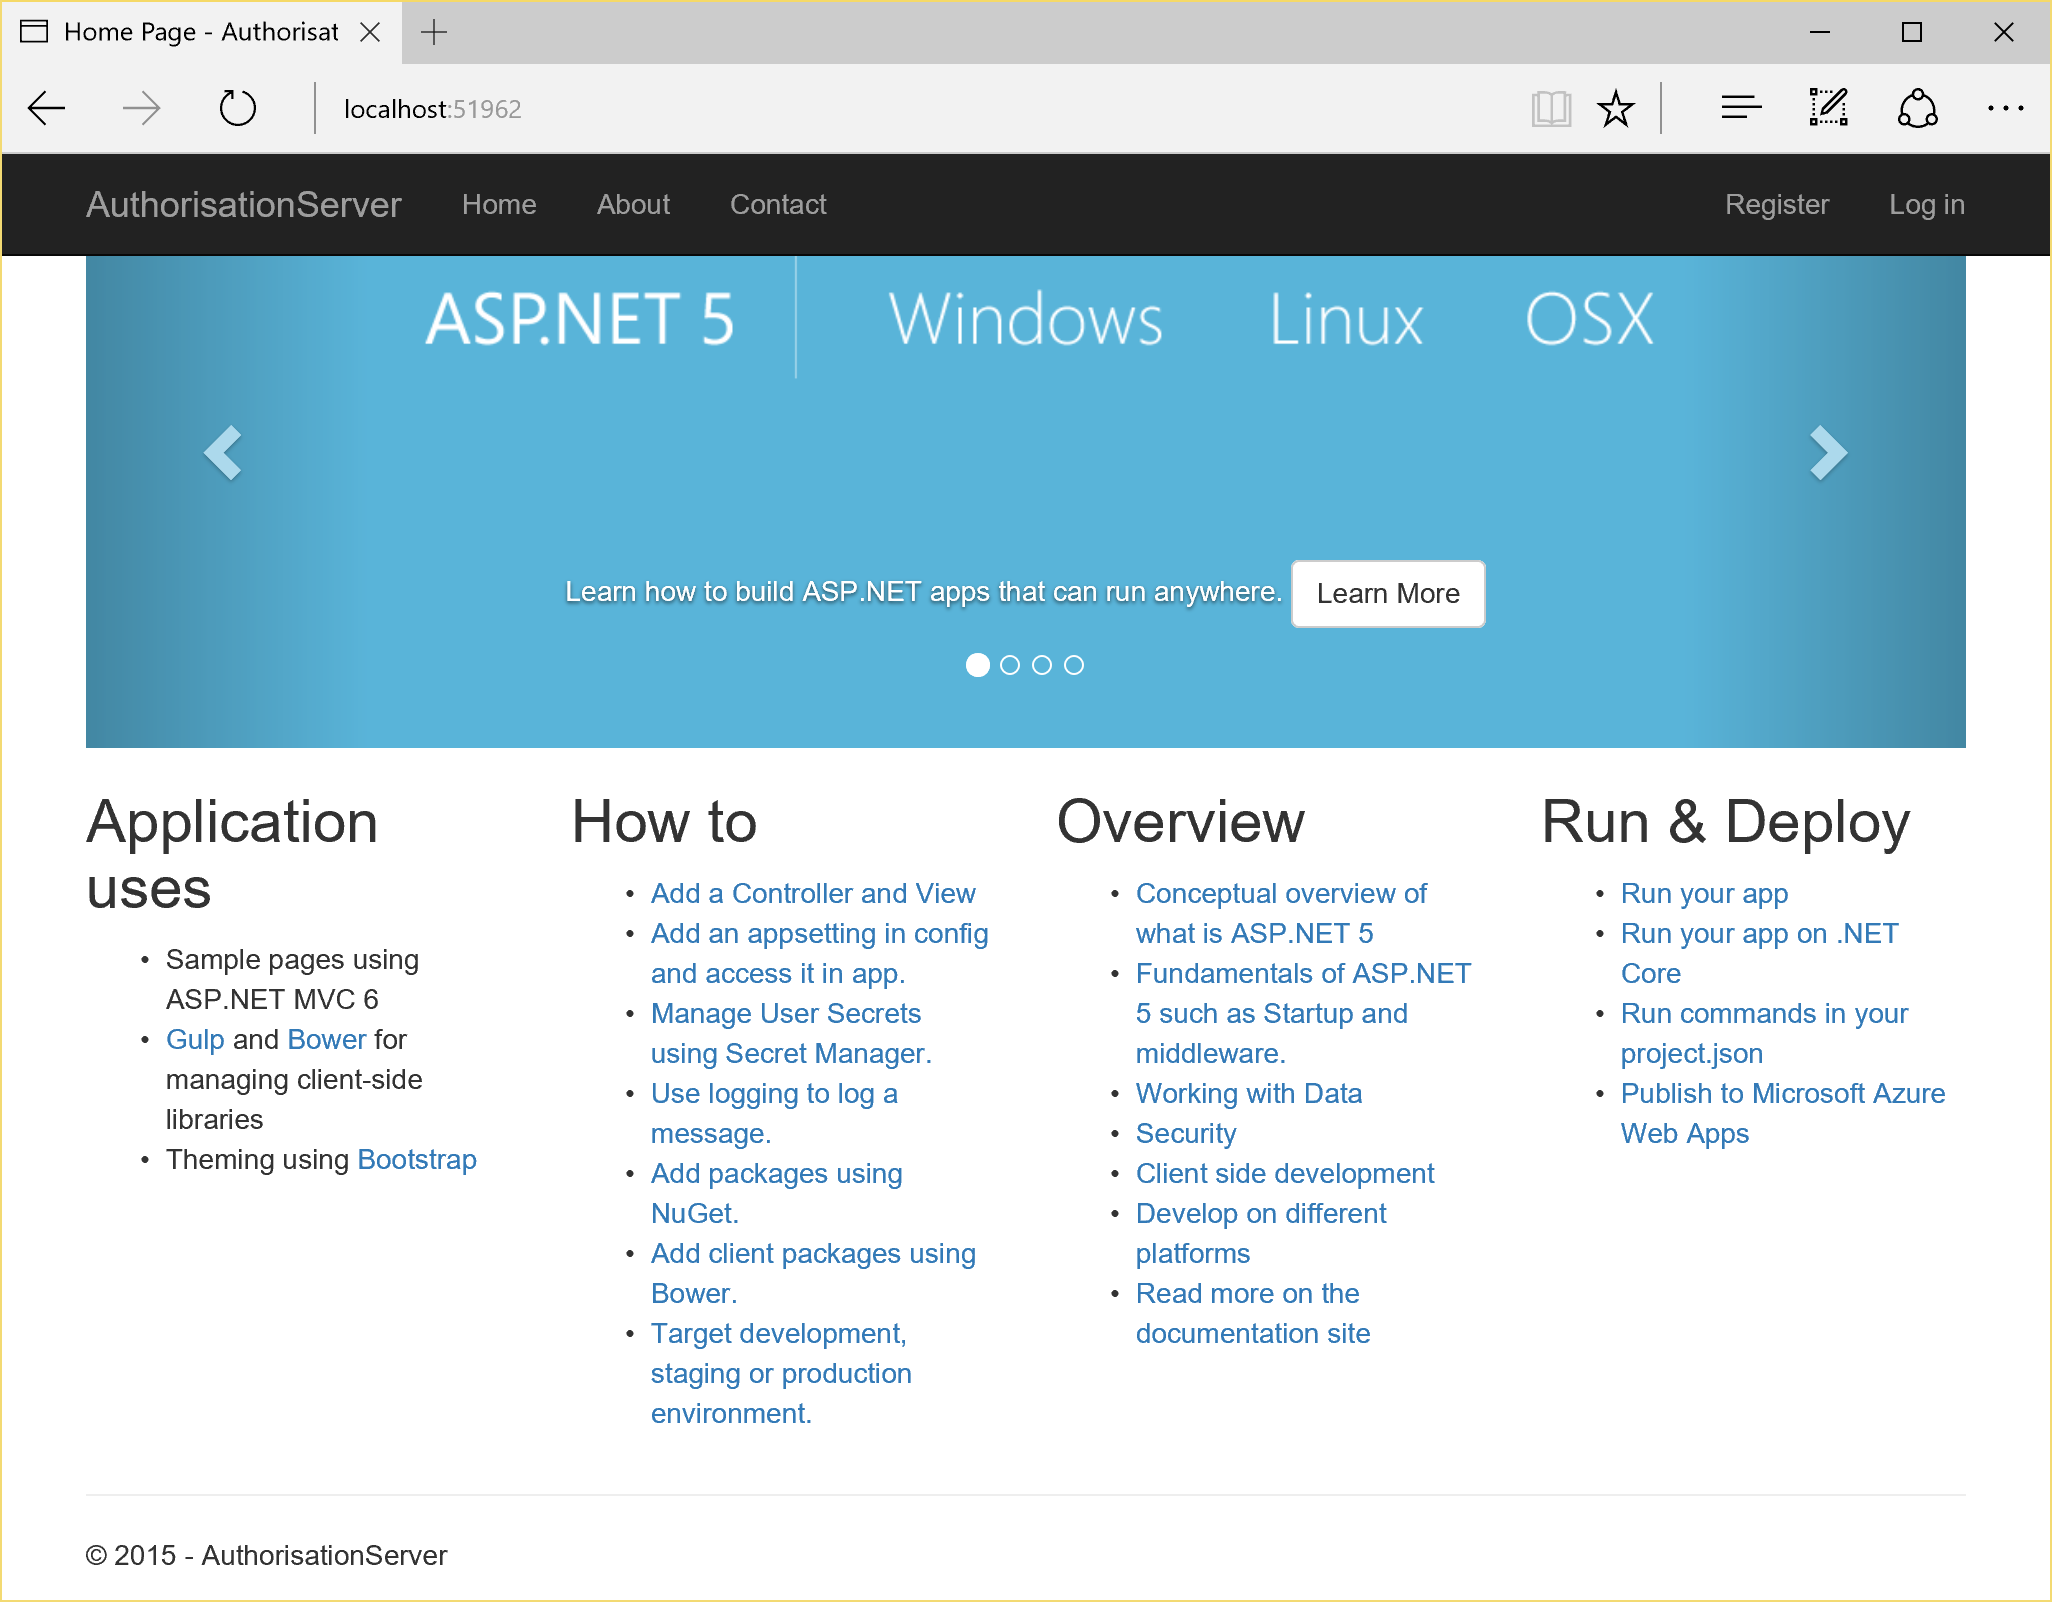
Now go back to Visual Studio, hit Ctrl+F5 and your authorisation server should run just like before:
Almost done…
We just need to tweak a few things in the authorisation server’s views.
The login screen that comes with the Individual Accounts template contains a Register as a new user? link:
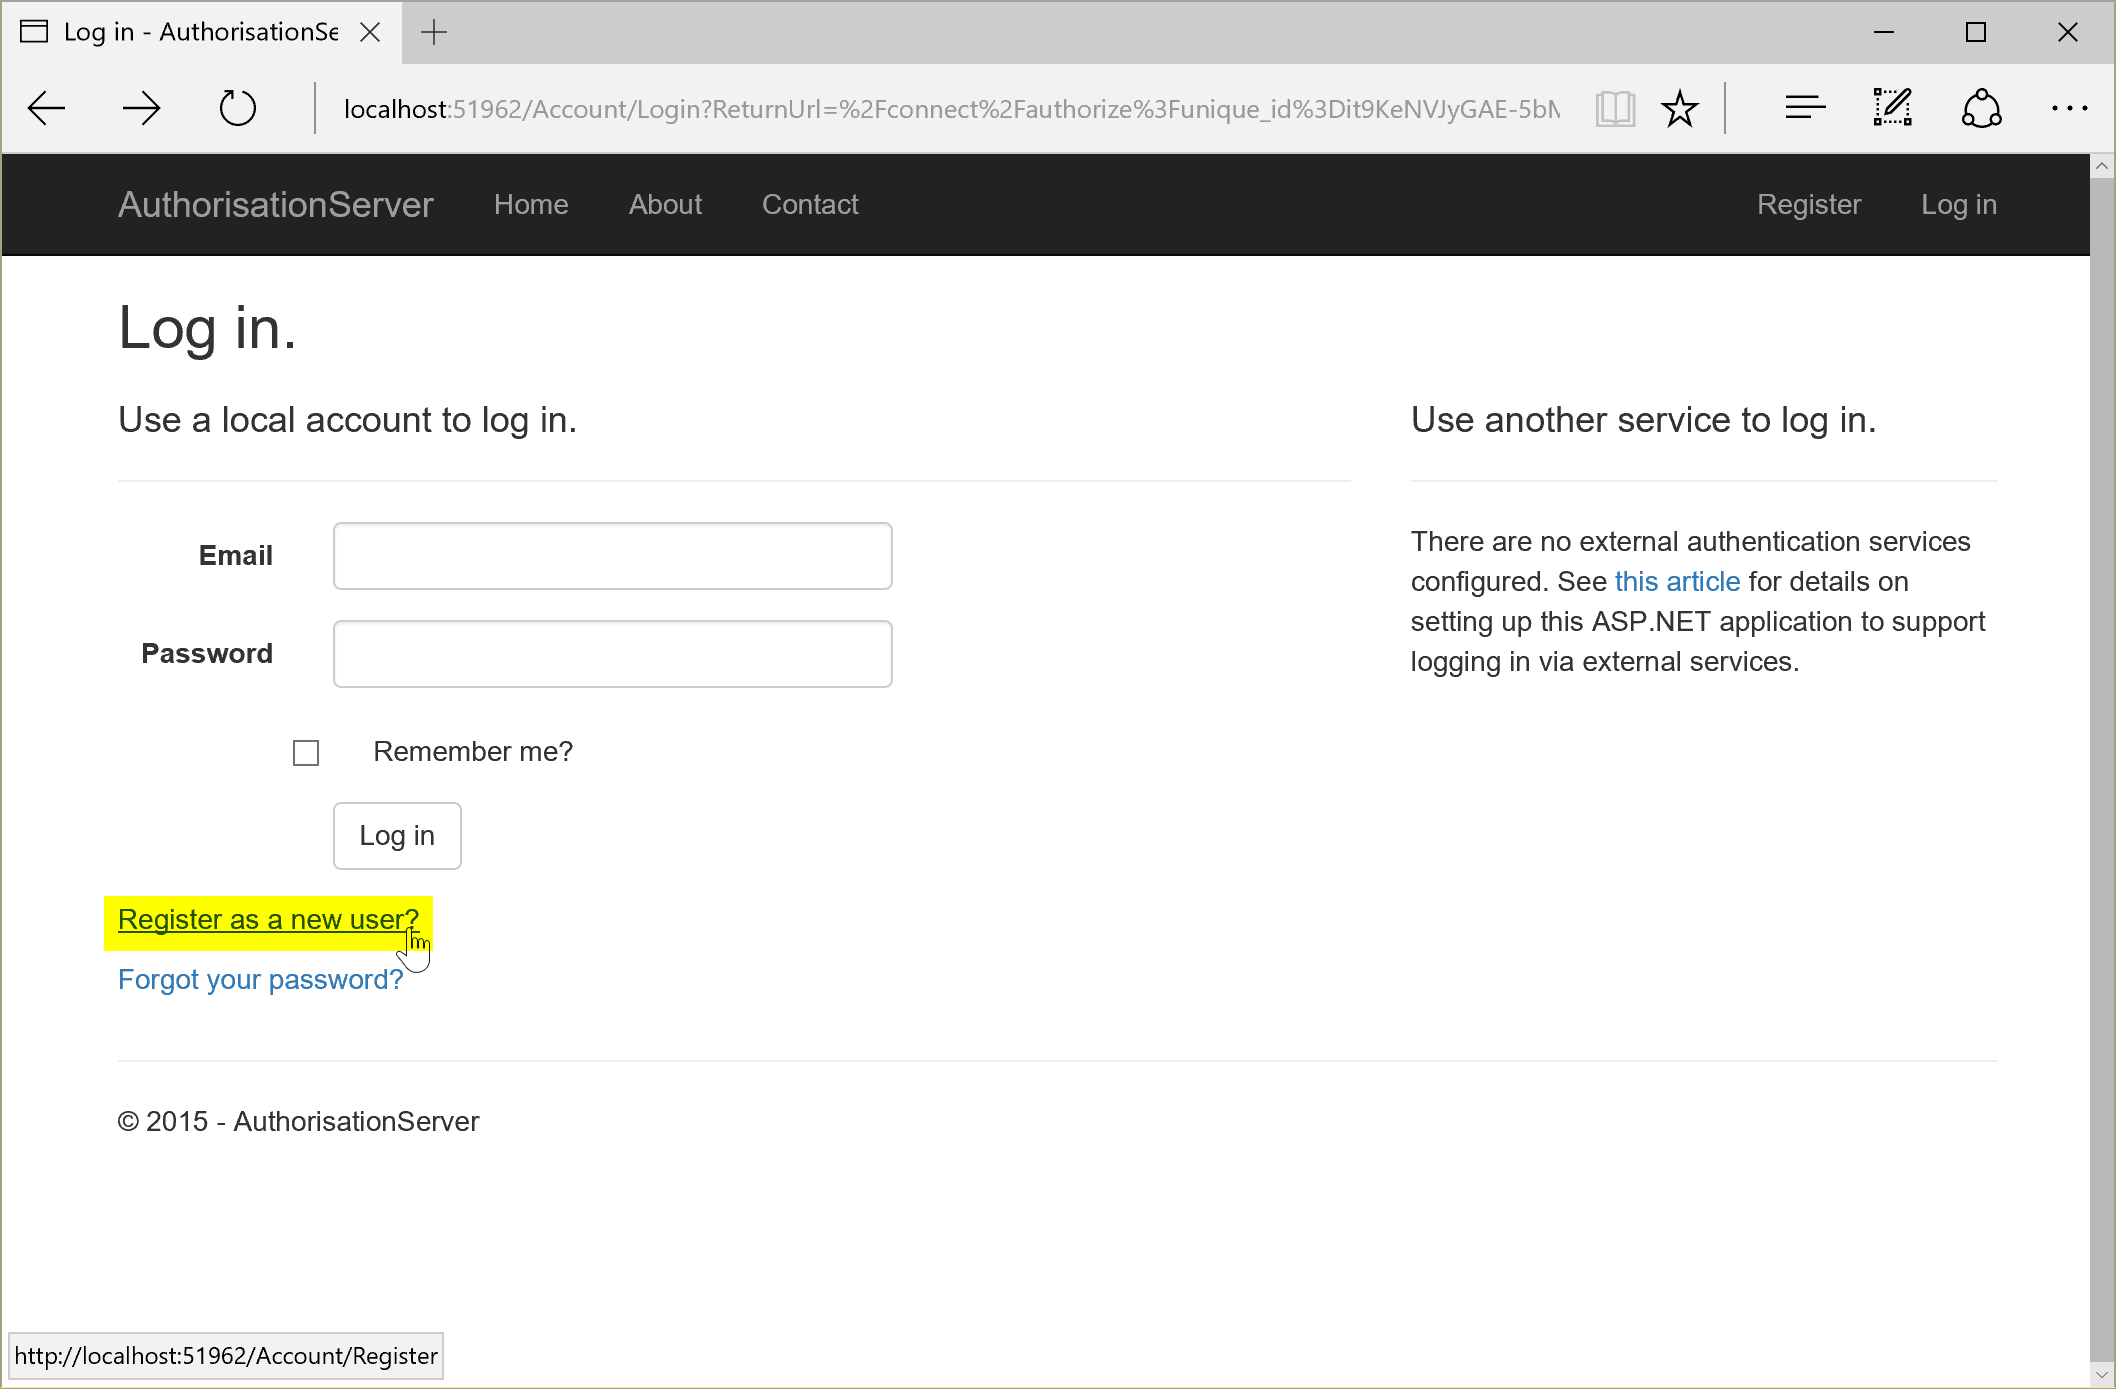
By the time we get to this screen, we are in the Authorisation App and all the details about the client that would like to login are contained within URL parameters, like this:
http://localhost:51962/Account/Login?ReturnUrl=/connect/authorize?unique_id=zA6nvD8tPm59uHkpeDmCruYWTlEd-NoiaMhTkWpJbTc
As such, as we navigate around the Authorisation App we need to maintain these parameters so that OpenIddict knows what to do when we’re logged in and where to redirect back to.
For example, if our user would like to create a new account, they’ll click the Register as a new user? link and be redirected to:
http://localhost:51962/Account/Register
This is no good, because now OpenIddict has lost all the information it needs.
Thankfully, this is very simple.
I have also submitted an issue to the ASP.NET templates project to add support for this: https://github.com/aspnet/Templates/issues/359
For now, in the Authorisation App, open up the following files and update the code as described.
Login.cshtml
Add the asp-route-returnUrl="@ViewData["ReturnUrl"]" to the Register as a new user? link:
<a asp-action="Register" asp-route-returnUrl="@ViewData["returnUrl"]">Register as a new user?</a>Register.cshtml
Add the asp-route-returnUrl="@ViewData["ReturnUrl"]" to the form declaration:
<form asp-controller="Account" asp-action="Register" asp-route-returnUrl="@ViewData["returnUrl"]" method="post" class="form-horizontal" role="form">AccountController.cs
Update your Register GET and POST methods to accept the returnUrl parameter and assign the return URL to the view state:
//
// GET: /Account/Register
[HttpGet]
[AllowAnonymous]
public IActionResult Register(
    // Add this parameter
    string returnUrl = null)
{
    // Add this assignment
    ViewData["ReturnUrl"] = returnUrl;
    return View();
}
//
// POST: /Account/Register
[HttpPost]
[AllowAnonymous]
[ValidateAntiForgeryToken]
public async Task<IActionResult> Register(RegisterViewModel model,
// Add this parameter
string returnUrl = null)
{
// Add this assignment
ViewData["ReturnUrl"] = returnUrl;
...
}Later in your Register POST method, change the return from:
return RedirectToAction(nameof(HomeController.Index), "Home");To:
return RedirectToLocal(returnUrl);Now everything is set up, you should be able to go to your client app, run it, click Sign in, go through the motions of signing in.
The sample projects from this code can be found on GitHub here: https://github.com/Brandless/DayZero/tree/master/Demos/Overengineer/OpenIddict%20Demo%201